Showing posts with label Mental Ray. Show all posts

Mental Ray - Caustics, Materials, Physical Sun, Portal Lights, HDRI

A lengthy post coming up - looking at Mental Ray with Caustics, Materials, Physical Sun and Sky, Portal Lights and HDR images.

Caustics
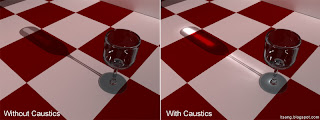
Caustics is the name given to the phenomenon of bright hot spots when light is refracted through materials such as glass or water. In this case, applying the caustic setting (along with final gather and global illumination) helps to simulate this effect.


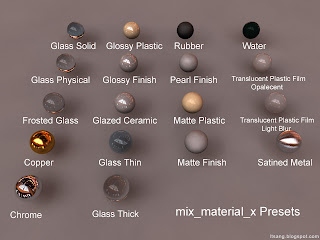
Mix_Materials_X
Mental Rays default mix_materials_x has a number of preset settings that work quite effectively. The versatility of the material is impressive especially considering the fact that these presets can be combined and mixed together for entirely unique results.


Physical Sun and Sky
Mental Ray has the option of using a Physical Sun and sky to light a scene - here we delve into some of the finer settings.

With a default sun and sky, the horizon line must be adjusted to match the scene.


Adjusting the physical sun direction will simulate different times of day, where the sun disc scale attribute can be tweaked to change the size of the sun.
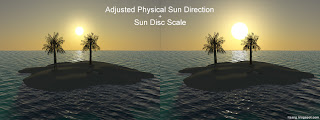

A early afternoon lighting is achieved by rotating the sun by a rough value of 135.
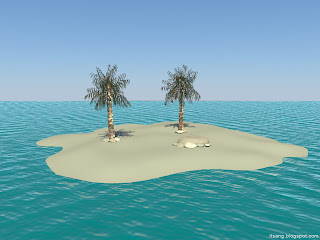

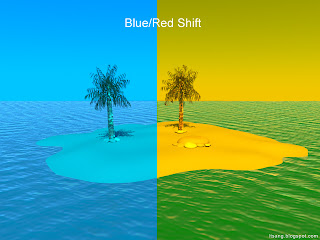
If necessary, the hue to red/blue can be tweaked to match specific scenes.

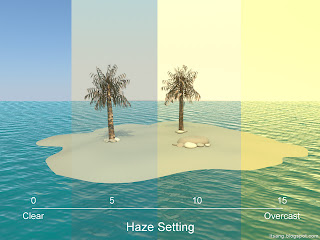
Where the haze setting can be adjusted to create a clear day or an overcast one.

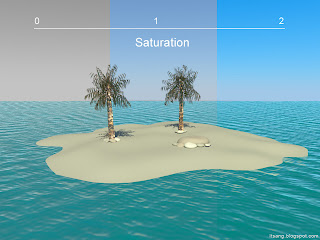
Saturation levels can also be tweaked to a desired effect.

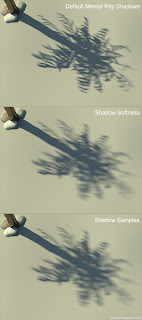
Shadows created by the physical sun and sky can also be tweaked. With the example below, increasing the softness and number of samples can help achieve a softer look to shadows while maintaining quality.


Portal Lights
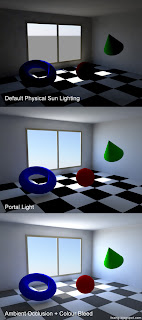
Mental Ray's physical sun and sky do not work so well with interiors. However, this can be amended with the use of portal lights to help light any interior scenes. As such, ambient occlusion and colour bleed can be used to have colour bounce of surfaces.


HDR (High Dynamic Range) Images
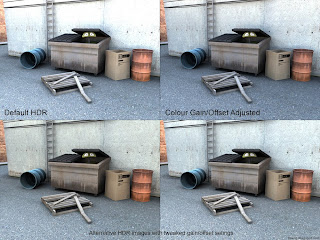
HDR images used for lighting can provide a much greater level of detail to a scene, particularly with reflective surfaces. Often, it alludes to the world outside the scene with a chrome ball type reflection.

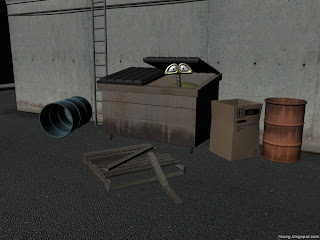
Base scene

Tweaking colour gain and offset values is integral to achieve desired results when using HDR images. While it may not be noticeable in the examples below, different HDR images were used to experiment with gain and offset values.
Displacement + Final Gathering + Global Illumination

Here we have explored the use of Displacement, Final Gathering and Global Illumination with Maya and Mental Ray.

Displacement
Displacement maps can add additional detail to basic geometry. Where black areas of the map are 'lowered' and white areas are 'raised' off the object mesh, 'Mid-Greys' are the baseline value where no displacement will occur.


For displacement maps to work properly, its important to determine the Mid-Grey value of the map by adjusting the 'Alpha Gain' and 'Alpha Offset' accordingly.


Below are further examples of displacement, using a non-subdivision setup for unsmoothed objects, a subdivision setup for smoothed surfaces as well as a nurb surface displacement.


Final Gathering
Final Gather works by projecting 'Final Gather Rays' into a scene which scatter upon contact of an object's surface. This effectively calculates 'bounced light and colour' which can be used to light a scene independently or in conjunction with Global Illumination.


Global Illumination
Global Illumination makes use of the photons being projected into a scene. The photons are absorbed and reflected throughout the scene where colour inheritance can occur to bounce or bleed as it moves between different surfaces and their respective material. As such, global illumination can mimic real-world lighting conditions as the photons carries wavelengths of the colour spectrum. Final Gather can also be used to smooth the photons out.

Motion Blur + Depth of Field

Here we have explored the use of Motion blur and Depth of Field within Maya Software and Mental Ray.

Motion Blur

Motion blur can be useful in adding to the believability of movement as demonstrated with the jet planes below.


However, it can significantly increase render times and should thus only be used when appropriate to the scene. The image below demonstrates the difference between Maya Software motion blur to Mental Ray's motion blur, with the latter added another minute to fully render. Switching from 'Scanline' to 'Rapid Motion' (rasterizer) in Mental Ray can help reduce render time while keeping desirable results.


Depth of Field

Depth of field can be achieved with Maya's cameras to simulate real-world cameras in focusing on specific subjects. Again, this increases overall render time where Zdepth render layers could be used instead to simulate depth of field in compositing.


Mental Ray

Here we are delving deeper in rendering with Mental Ray, understanding some of the differences and limitations between Maya Software rendering and Mental Ray, to optimising scene files to ensure best possible render times.


Shadows - Shadow Map
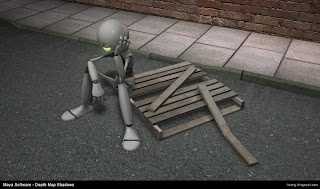
Depth Map Shadows from Maya Software does not function with Mental Ray, however, these can be 'transferred' into a similar representation using Mental Ray's Shadow Map overrides if needed.

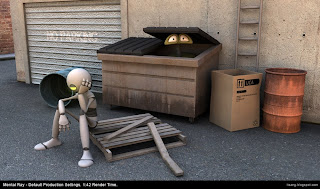
Below, the first of the two images show Software Rendering with Depth Map Shadows, with the second demonstrating Mental Ray using its own Shadow Map overrides transferred from the original depth map shadows.


Optimising - Binary Space Partition (BSP)

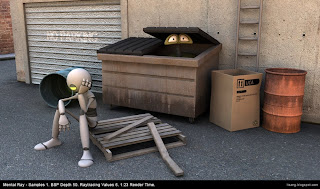
To optimise scene files and minimise render times, adjusting and noting the BSP Depth can help reduce render times by balancing the BSP Size (Size of Memory Leaf) with the BSP Depth (Depth of Memory Used). In addition, Raytracing settings and sampling values can be reduced to greatly reduce rendering times with little impact on the scene as a whole.

The images below demonstrate the changes in render time from Metal Rays default production settings to a few minor adjustments as described above; making around a 20 second difference, with only a very subtle difference in image quality.


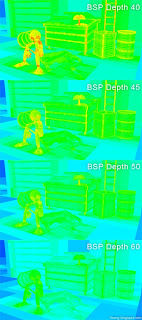
Examining the BSP Depth further can be achieved using 'Regular BSP' with 'Depth' diagnostics. Red areas signify High areas of memory usage, with Greens/blues signifying low.


Much of this Optimising process depends on the scene itself requiring some specific tweaking for each individual scenes, where its benefits will certainly pay off by reducing render times when rendering full animation sequences.

Note: For some reason, I couldn't get the Output Window to display the BSP reports despite changing the Verbosity Level to 'Progress Messages' in Maya 2011. Information about the render would appear as normal when rendering in the output box, but lines concerning BSP data was simply missing. I ended up using Maya 2010 which functioned fine by reporting the BSP data as normal.